


Hi everyone!
For those of you who read my previous post, I am recovering well. Still dealing with insurance and still off work but gradually getting back to walking properly. Tomorrow I have my next X-ray and find out whether I need more surgery or not.
[edit:] little update. It's looking like good news and I probably won't be needing any further surgery to my bone. Next appointment in 6 months.
Anyway... Y'all ready to learn some stuff? ...No? Good job this is NewGrounds and not school then!!
Seriously though, I'm just documenting the process for my entry into Jazza's Ministry of Silly Walks competition, for anyone interested. Lets start from the beginning. Almost straight after seeing the post, I sat down and did some quick planning. My parameters were simple; with it being defined as a walk, I quickly decided his elbows/hands shouldn't go above the height of his shoulders/head. I also wanted to experiment with smears, balance and squashes – all techniques that haven't really been utilised much in my previous animations.
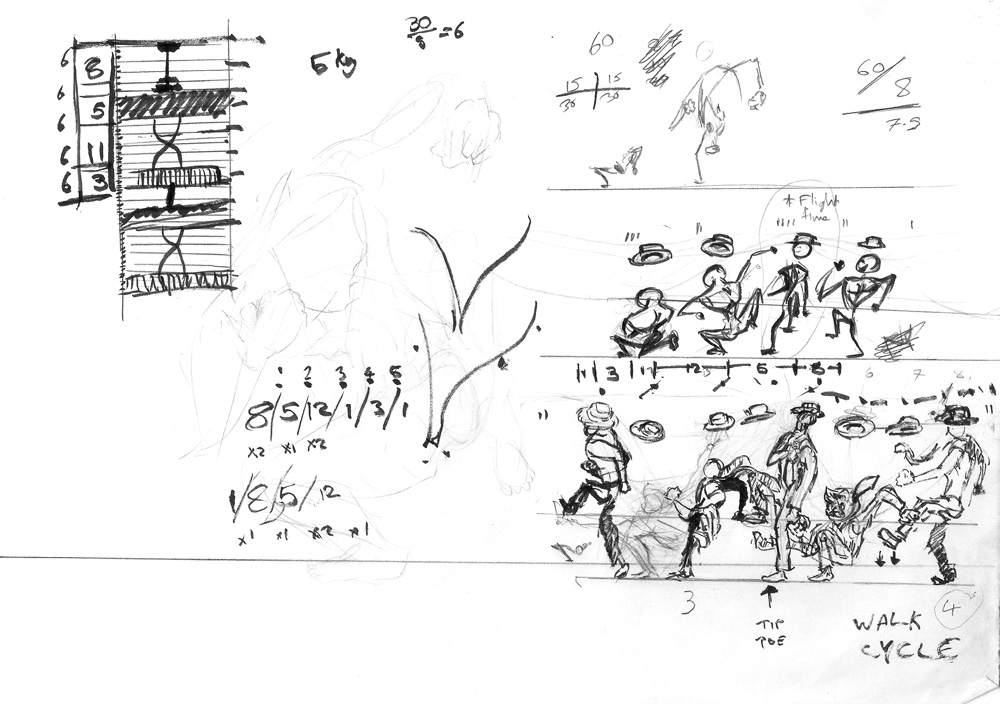
Here is my very rusty working out. It had been over a year since I animated properly, mostly due to being injured. At the top left, you can see a very very rough X-sheet. This is where I worked out the timing for each pose. If you're interested in animation and not sure what an X-sheet is, be sure to look it up! Highly useful. From this, I worked out the numbers you see below it and along the top. This tells me how long between each keyframe. Based on those numbers, I did the rough character tests on the right. Also labelled this page "Walk Cycle" in the bottom right, due to the drunk guy in the club asking what I was drawing.
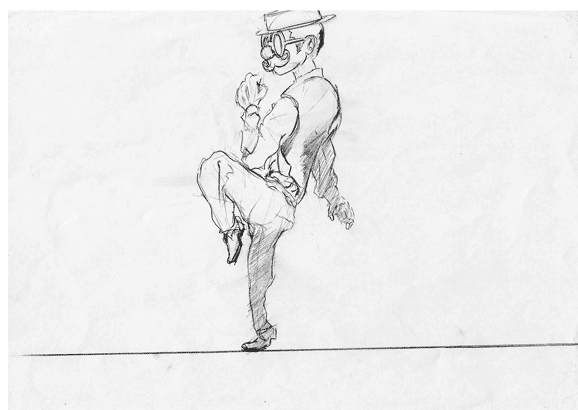
From this and some rough sketching, I was able to draw my 10 keyframes as you can see in the gif above (5 keys per step). Basically, these are the 10 poses which define the extremest parts of the movement. With this I could then fire up my equipment once I got home; starting by scanning all 10 frames in and dropping them into Flash. I wont talk you through this process, or setting up Flash files as there is a plethora of videos and articles about that.
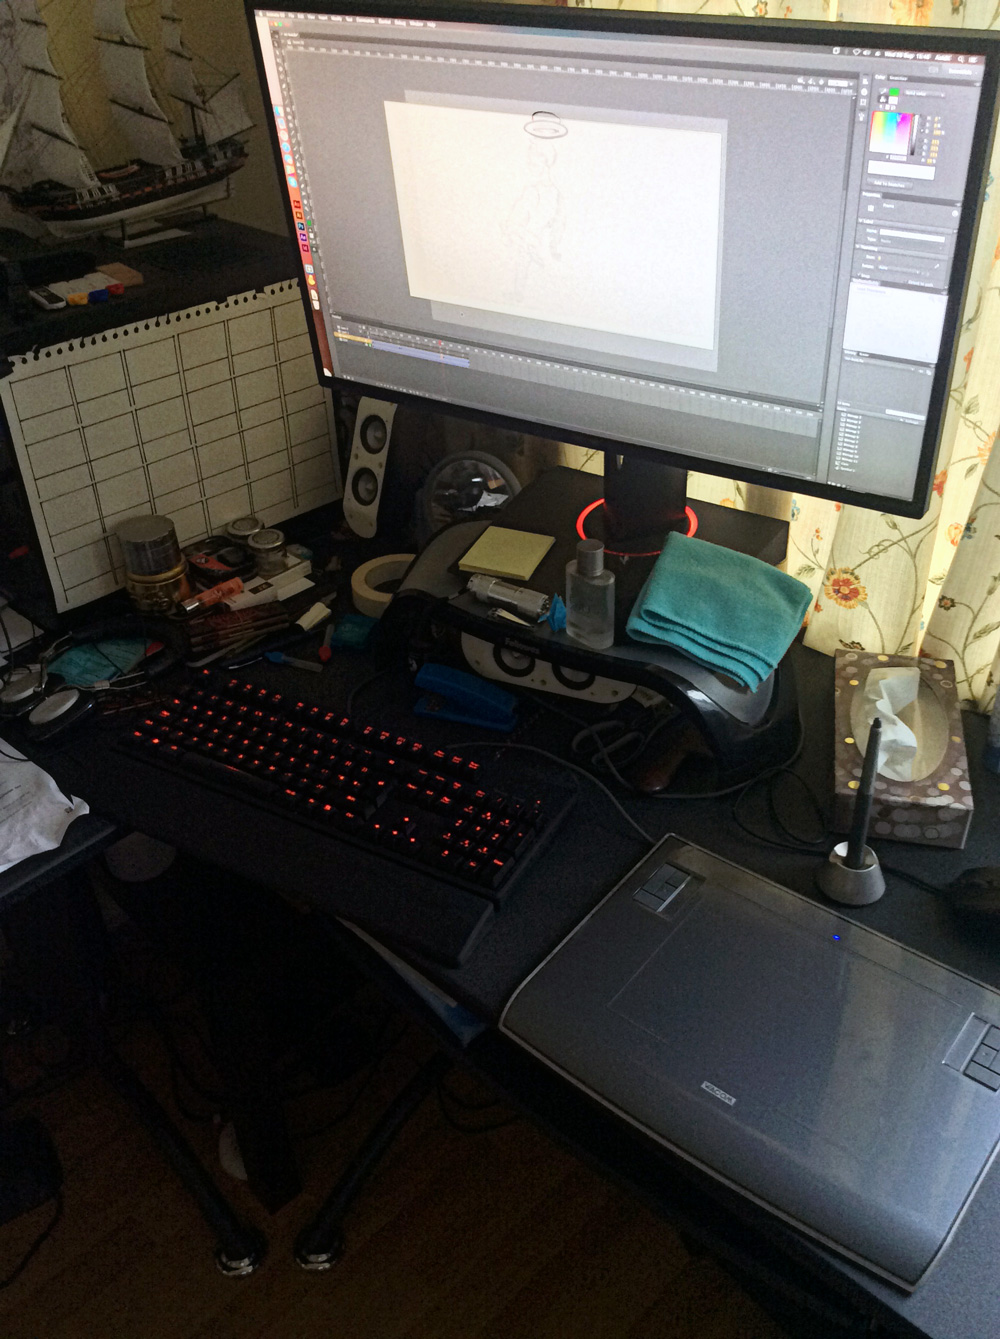
This is about as tidy as my desk gets. To the left of here is my drawing area and a wall full of reference drawings. This stage was quite simply taking my scanned images, lining them up correctly on the timeline and then drawing over them with the Brush tool. Making sure they are all the right size, in the right position and so on. This looked something like the following:

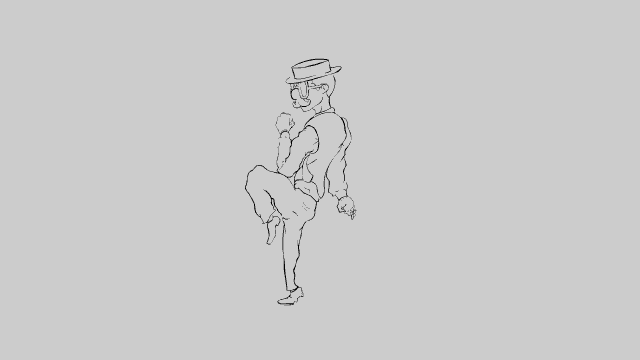
To break that down, you can see my 10 bitmap images in the library. I mashed them together into a graphic/symbol, which is on the timeline as a tween. This allowed me to reduce the opacity/alpha and trace over them on the corresponding frames, in the main timeline. Once the 10 keyframes were done and spread correctly over the timeline, I hid the sketches layer and simply got to work on the inbetweens, as you can see below.

Starting in the middles, setting my onion skin to reach the next and previous keyframes. Once the middle frame was done, I'd do the frame between that inbetween and the next keyframe, etc. Occaisionally I copy another frame and paste it to the side (as above), so I could see the equivalent of that frame on the opposite step.
Boom. The linework alone took me 4 solid days of working on it when I could. Was pretty happy with it, didn't really have any time to be unhappy with it! In my haste to get started on this project, I overlooked that our entries didn't need to be a full 60 frames – only be a for 2 second loop. So, I drew mine on one's, when ideally and normally I'd have animated on two's or three's; allowing me more time to polish the linework and refine the colouring. Still, doing it this way was a nice process for me to flex my animation muscles, for the first time in ages. Maybe, subconsciously, I wanted to challenge myself by doing it this way?

Next stage was simple. Pick the colours, fill in the gaps and paint it. I tried to tidy up some of the linework as I went back over each frame but there was no time for redrawing or smoothing it – just erasing overlapping edges and tidying up confusing lines. As the overlay sheet came off my tablet a long time ago, drawing on the hard plastic of my Wacom with an ancient blunt nib, creates a very scratchy finish on the finer/smaller lines. To create anything that looks refined and sharp, I generally spend a long while on cleanup. Still, I'm amazed this bit of kit even works after all its been through the last ten years or so.
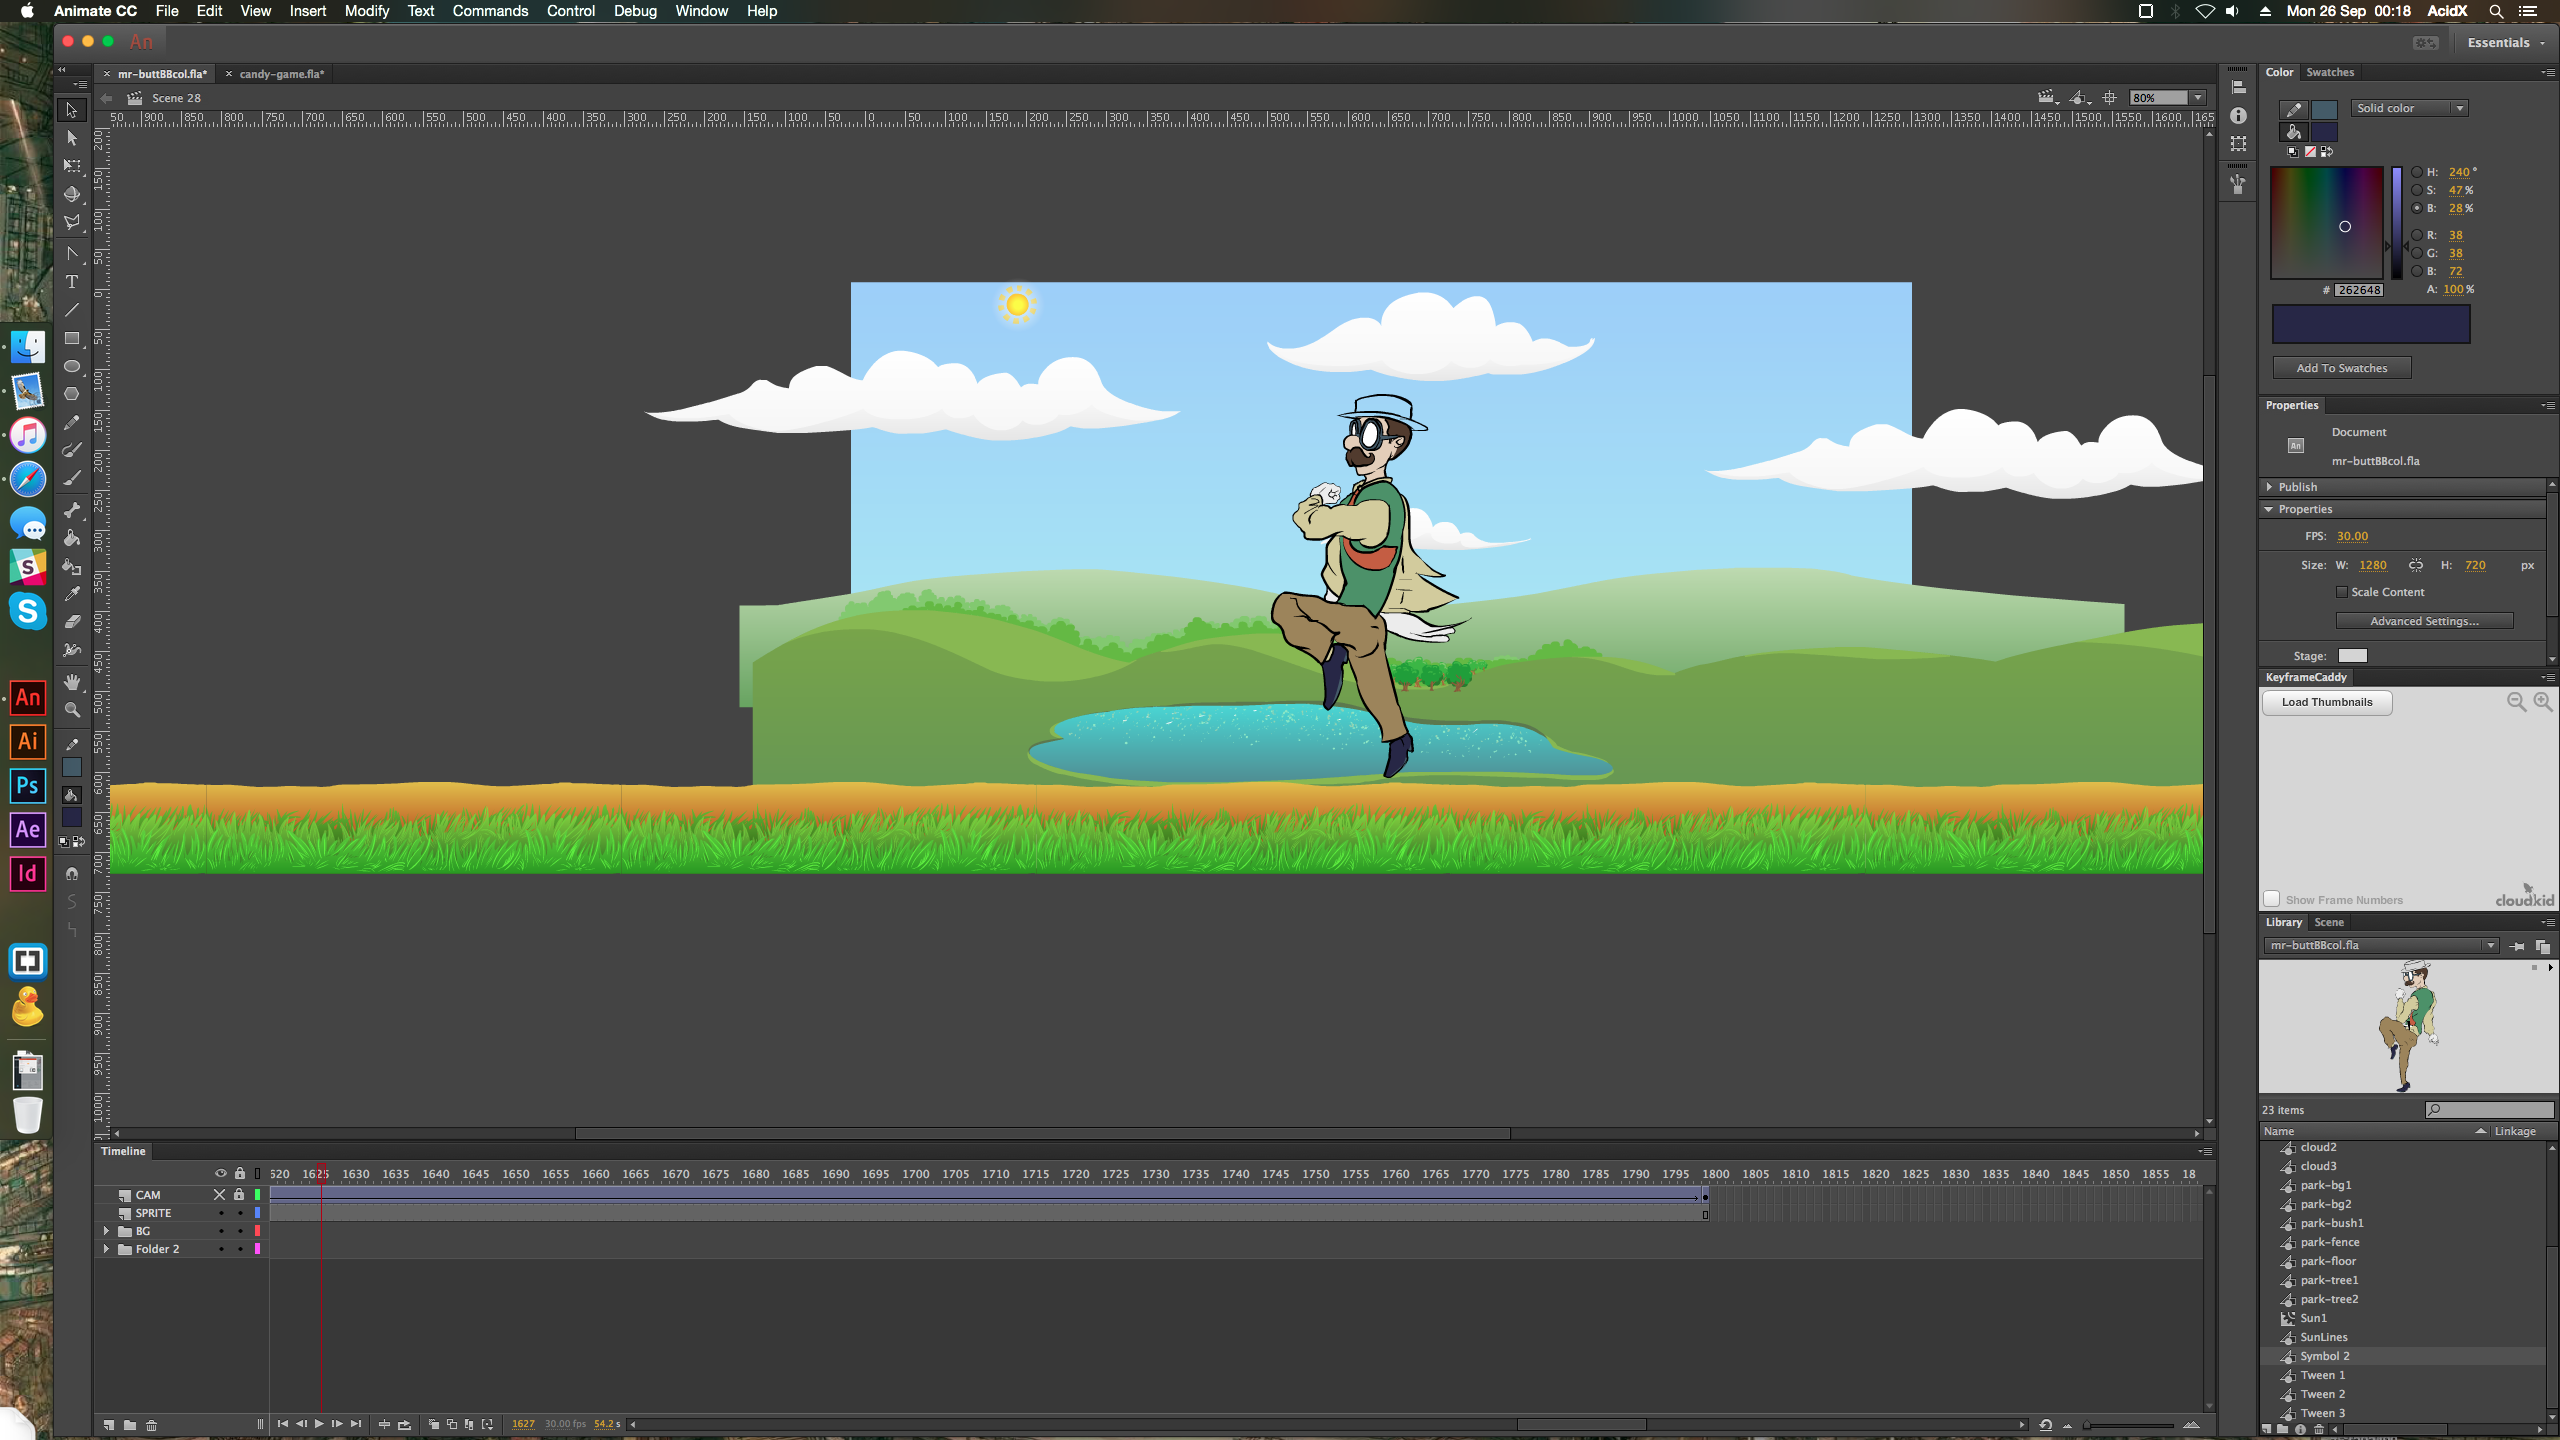
As colours started to come through, I decided to drop in my background. The plain grey stage wasn't giving me an accurate representation of the contrasts and such. These backgrounds were just assets from a game I helped create. Nothing fancy. Dropped them in, tweened them across the stage, extended the animation to 1,800 frames. That was about it for them. Carried on colouring my character.

Of course...Constantly exporting the animation and testing it all looks correct, runs fluidly – all the time! Still very much a work in progress at this point but it let me see if I needed to tone anything down or change some colours to fit better. Luckily I was pretty happy with how colouring went from the start. I did try a few different shoe colours but settled on the snazzy darker ones in the end.
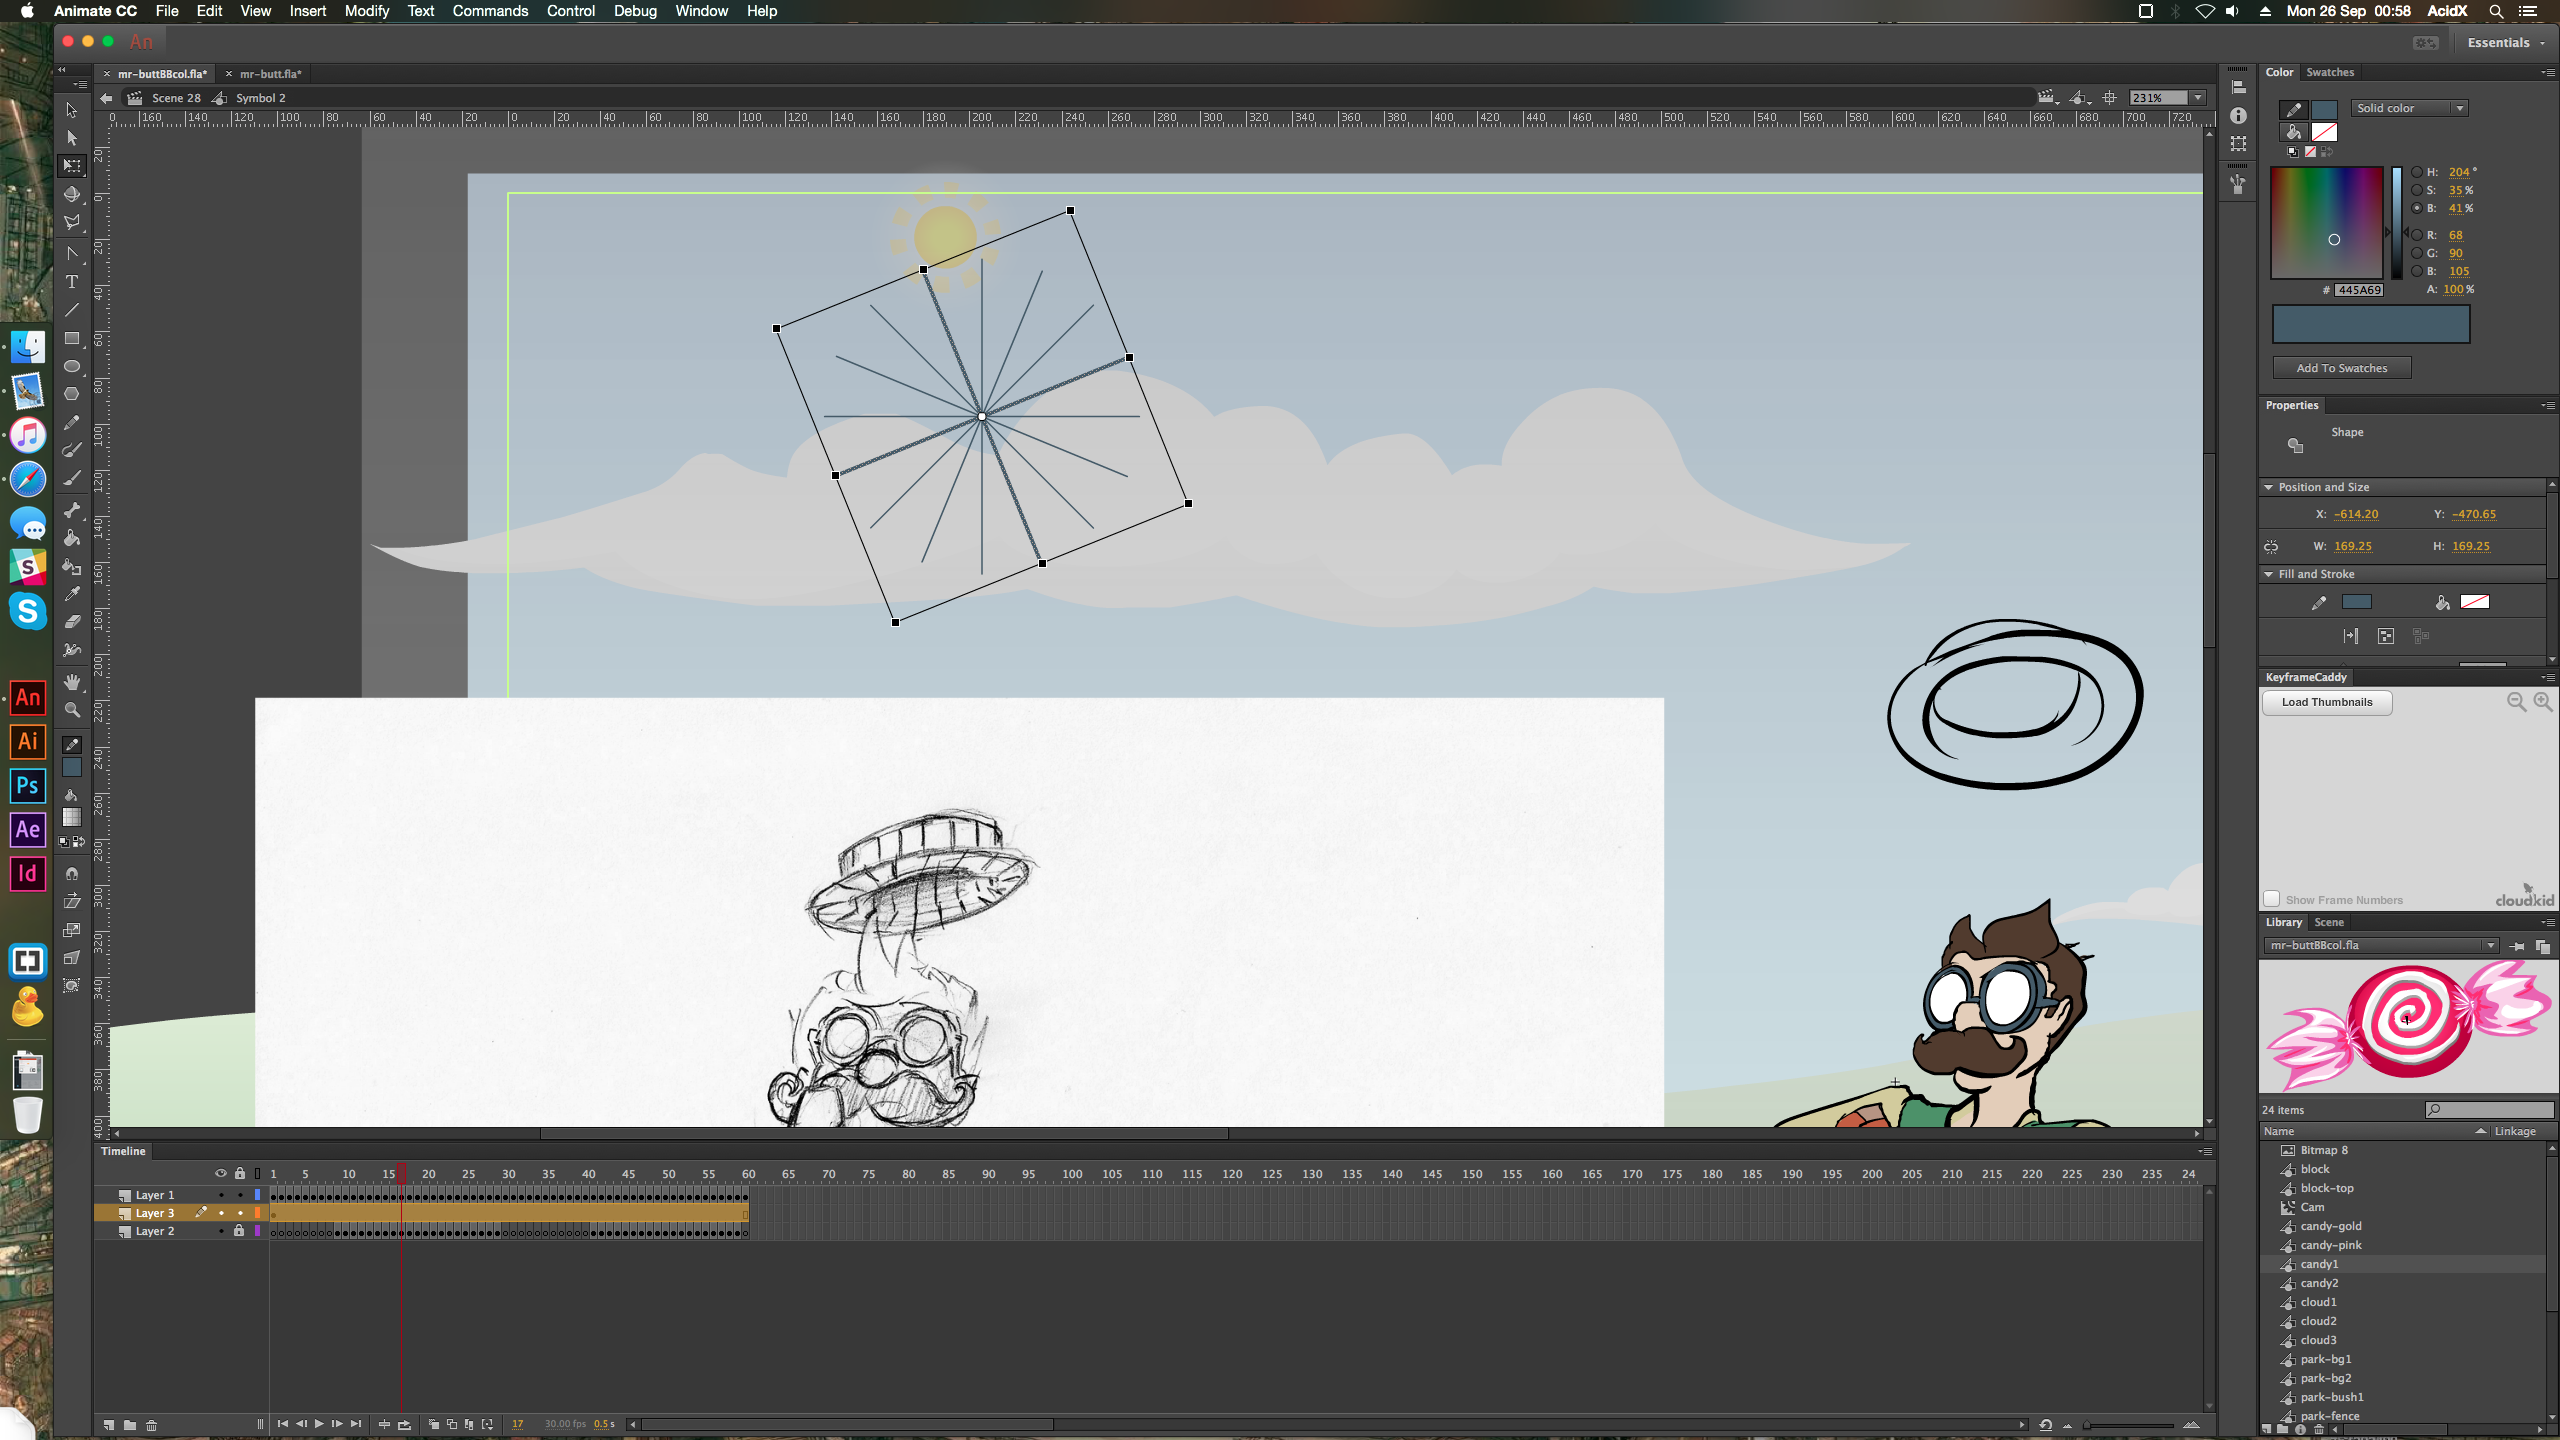
Here's how I got the stripes on the hat. It's quite a simple drawing technique and popular shading technique in Flash - using the line tool. Two lines, forming a plus + shape. Copy them, paste them in place, rotate them 45 degrees. Paste them again and then again. Basically, you're left with sixteen lines, in the starburst shape you can see above. Taking this shape and warping it, as you can see below, allowed me to accurately colour the stripes and maintain the same position on them over time. It was important to get one of my sketches back on the stage for this part. This let me judge the orientation of the hat better than my plain uncoloured versions, without having to sketch all over them.
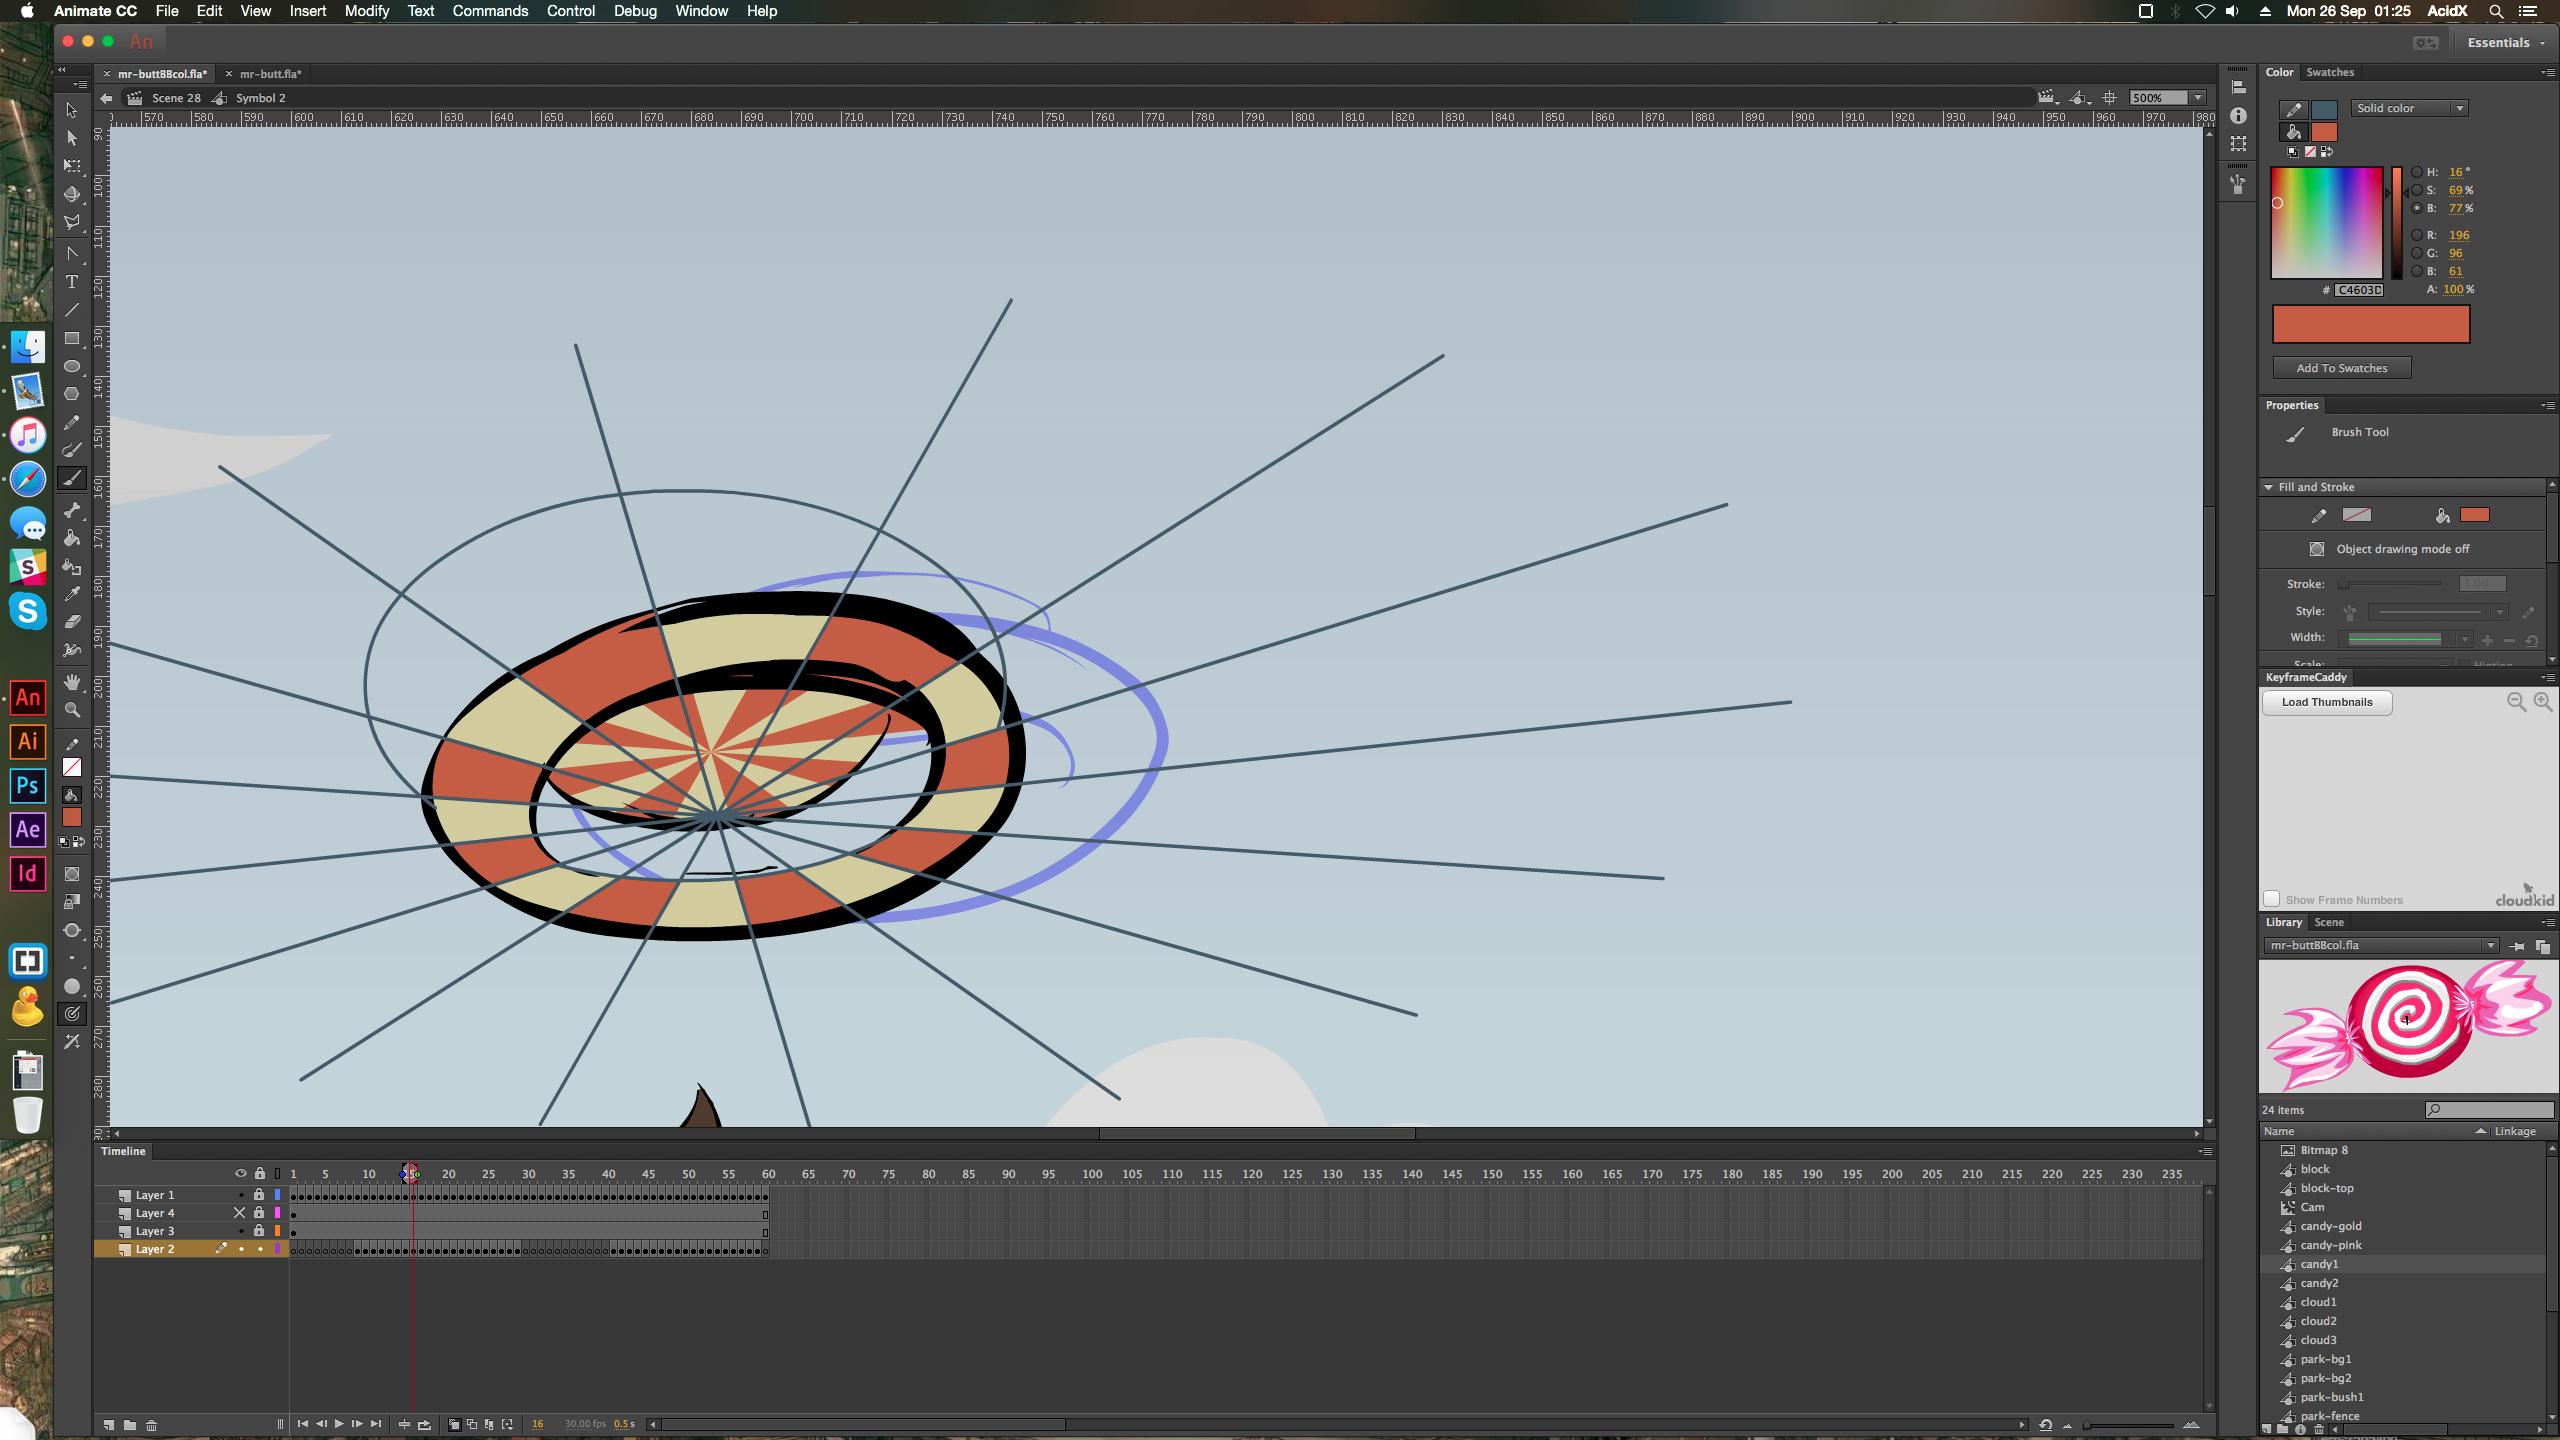
Once you fill in the colours, just select your whole layer and turn off any outlines/stroke by setting the colour to the diagonal red strip (like you can see in my toolbar on the left). Then you're left with nice colouring and no lines between shades. The hat was the final piece of this puzzle. Took almost a day to colour it on its own. I added some quick dust cloud effects on the stomping of his feet and when he pushed off but that was it. It was deadline day!
Thanks for reading. You can see my final entry to the competition here: https://www.youtube.com/watch?v=x1emTOte5j8
It aint perfect. I'm not overjoyed with it, that's what happens. As I've said, I'd rather have animated it normally and given myself a few more days to work on cleanup/colour, opposed to the majority of my time spent drawing all sixty frames. If I'd spotted this COTM on launch day, I'd have been super happy with the results at this stage. But..hey.. It's just for fun right? I learnt some stuff. I dusted off the rust that being handicapped has corroded onto me. I was kept busy and amused for a while... Plus... I seem to have gotten a bit of a bug back for animating. Realising I've learnt loads over the years and come a very long way since any of the movies I've released on here.
Which is partly the point of this post. I wanted to document this process, mostly to get me used to actually documenting my work. It's not something I usually do but something I should make a habit of. I have plenty of knowledge that I've learnt the hard way. There were no animation or digital art classes in my education. Yet, I've pushed on and learnt to create the art I wanted. So, if I can document it and publish my working... Hopefully I can teach or share a bit of it too? Rather than just showing the finished results, as I've become so trained to do. In time, I'd hope to make posts that resemble more like actual tutorials and maybe one day create video walkthroughs, once I've got some decent filming and recording equipment. That stuff is expensive and way off so, in the meantime, this is all great practice. I might give streaming a try, who knows? Meanwhile, if you have any comments or questions about any of the above.. Please don't be shy. I always encourage anyone to ask away.
I've seen some really great entries to this, as always with COTM. Go onto twitter and search #SillyWalkChallenge if you haven't, or a quick browse through the forum thread here. Great ideas and such massive variation. Even those of us who don't win, remember that: the real prize is in the process and learning. Something I've personally found to be true, upon reaching any goal or acquiring what I once defined as success. Good luck to all participants across all categories!
Peace to all.
Soupcat
ew 16:10 monitor
jk nice to see your workflow process! Really liked that you incorporated traditional drawings.
AcidX
Lol QHD is the bombest resolution for sure ;)
Thanks man. I really enjoyed the whole thing. Felt that the traditional side isn't really credited enough these days, beyond maybe storyboards. Truth is though, I just love the feeling of drawing on paper and don't think it should be discouraged or discredited.